
Verify your installation
Step 5 of the Start here flow. Pick the test flow that matches your printer family.
Bambu A1 Mini and A1
Board self-tests on boot. Plug the AMS cable back in and watch the LED + hear each component cycle once.
Bambu P1P, P1S, P2S, X1C, X2D
Manual test triggered by a long press on the outer door button. Runs fan (if installed) → bender → door in sequence.
Bambu H2S, H2D, H2C
Same long-press test on the outer door button. Runs bender 1 → bender 2 → door in sequence (no fan on the H series).
Common prerequisites
Section titled “Common prerequisites”Before running any of the tests:
- The printer is powered off and the FarmLoop controller is wired per your assembly guide
- The latest firmware is flashed on the controller board, see Firmware
- The bender / pusher is mounted but keep the printer’s AMS disconnected for the very first power-on, just in case
Also check: the limit switch is fully seated
Section titled “Also check: the limit switch is fully seated”A common cause of “the component and activation tests work, but real prints sometimes miss a trigger” is a limit switch that isn’t fully seated in its holder. The switch body must sit flush in the slot - pressed all the way in, with no gap between the switch body and the holder. If it’s even slightly loose, vibrations and toolhead movement during a real print can shift it enough that the bender no longer reliably contacts it.
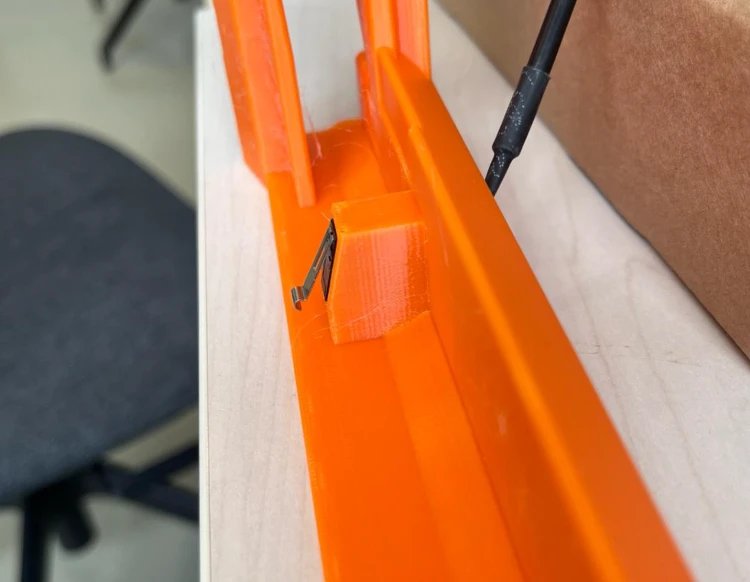
If the switch isn’t flush:
- Push it fully into the holder - a firm press down with your thumb is usually enough. The switch should bottom out in the slot.
- Reprint the holder with the newest revision if the slot is too loose or the switch won’t seat flush: download from the FarmLoop printable parts collection on MakerWorld. Newer revisions have tightened tolerances specifically to lock the switch in place.
After it passes
Section titled “After it passes”When the component test runs cleanly on your printer, move on to the Activation test print - that’s the first real G-code that exercises the full end-to-end flow including cool-down timing and actual eject.