Correct workflow, your first print with eject
Roughly one in four support tickets trace back to a missed step in this workflow, usually “I never clicked Add to Queue” or “I uploaded the wrong file”. Five minutes here saves you from most of them.
The 7-step workflow
Section titled “The 7-step workflow”1. Slice in Bambu Studio
Section titled “1. Slice in Bambu Studio”Prepare your print as normal, pick plate type, filament, and layer settings. The FarmLoop app doesn’t slice, it only processes Bambu Studio’s output.
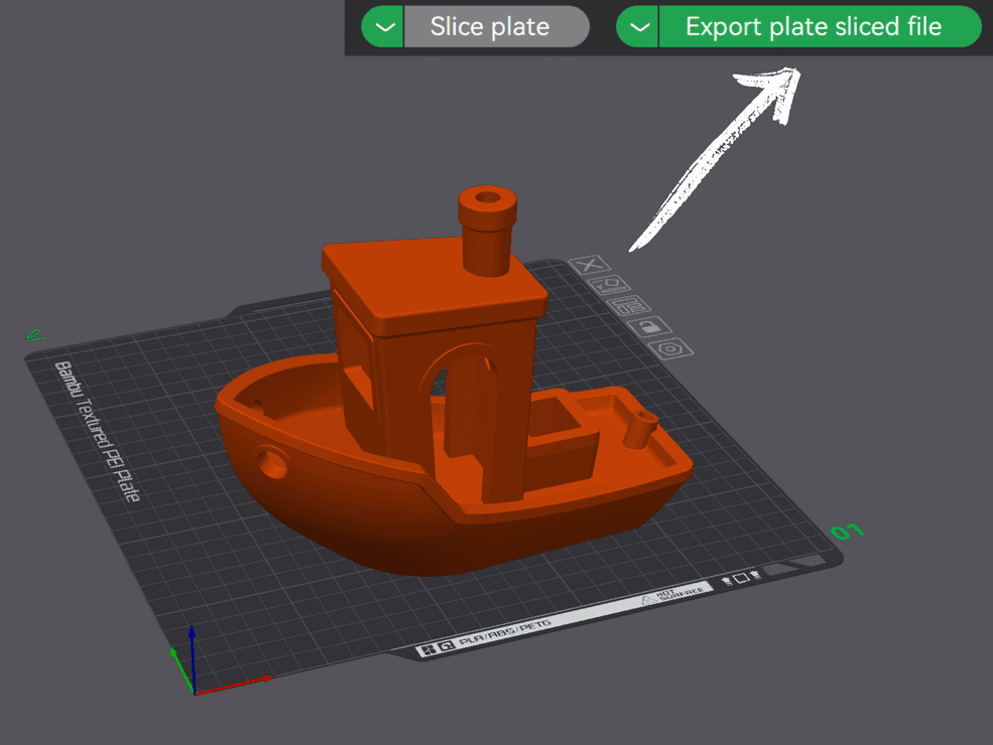
2. Export the plate-sliced file
Section titled “2. Export the plate-sliced file”In Bambu Studio: File → Export → Export plate sliced file.
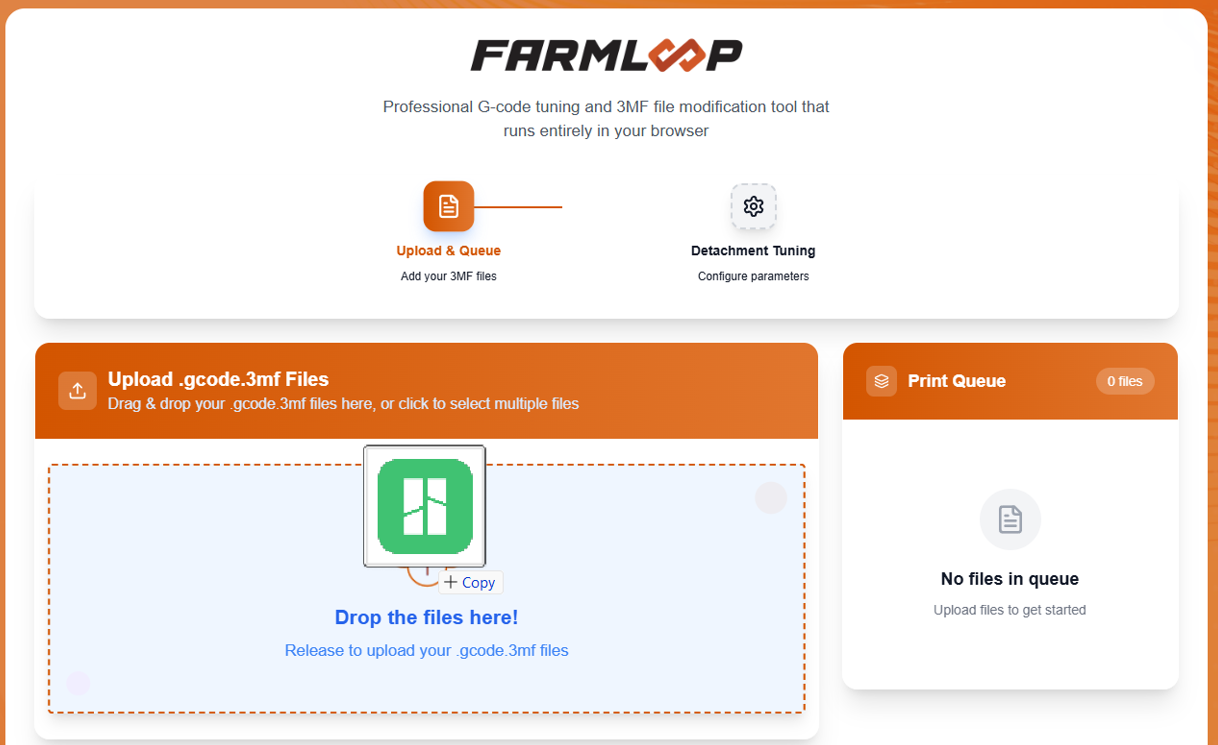
3. Upload to the FarmLoop app
Section titled “3. Upload to the FarmLoop app”Open app.3d-farmers.com and drop the .gcode.3mf file into the upload zone. You’ll see a preview of the plate once it parses.
4. Open Detachment Tuning
Section titled “4. Open Detachment Tuning”Click the uploaded plate → Detachment Tuning. This is where you set:
- Bed temperature threshold for eject (or switch to time-based)
- Z-offset adjustment
- Print orientation on the plate
- Fan upgrade on/off (if installed)
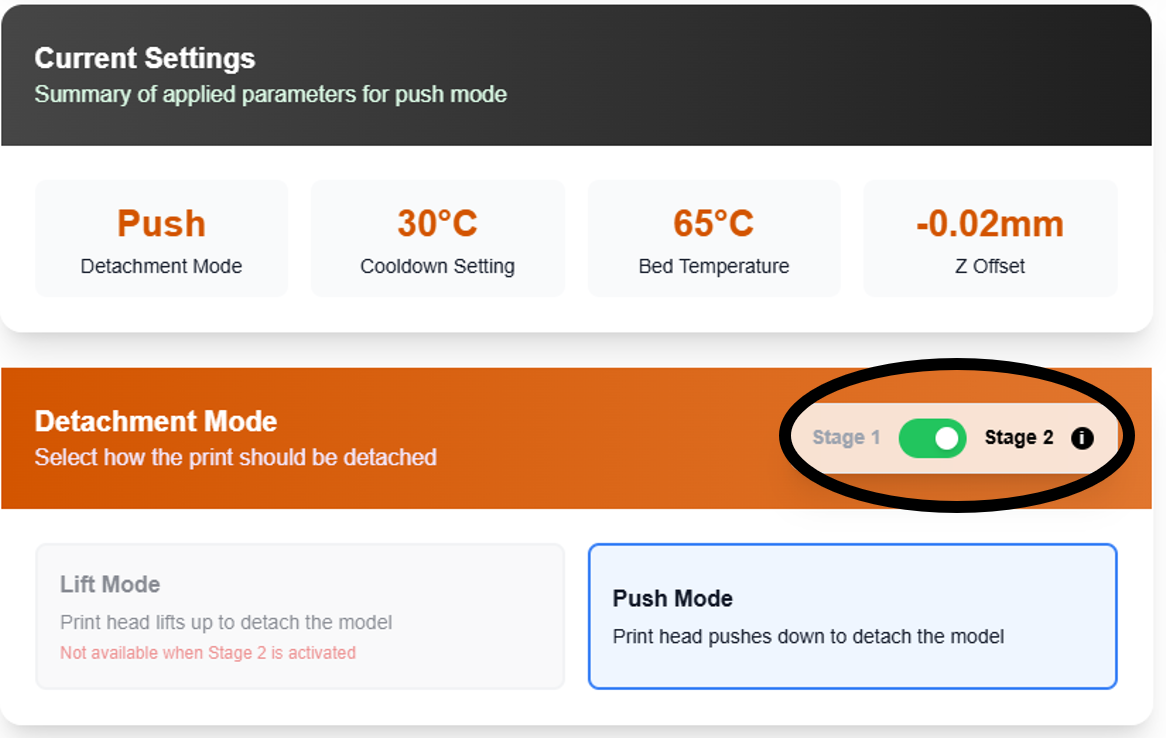
See Parts won’t detach if you’re unsure what values to use.
5. Click “Add to Queue” or “Process Gcode”
Section titled “5. Click “Add to Queue” or “Process Gcode””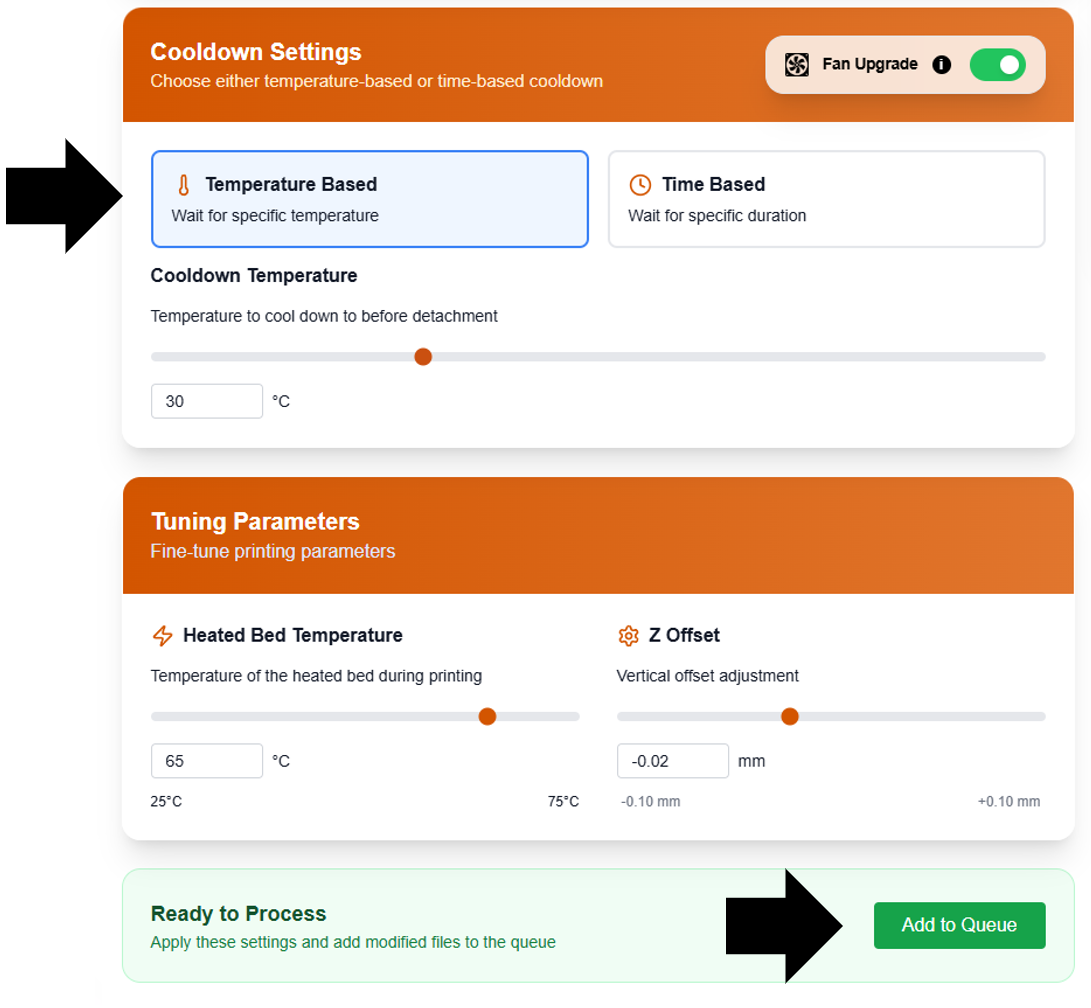
6. Download the FL_S1_... or FL_S2_... file
Section titled “6. Download the FL_S1_... or FL_S2_... file”After Add to Queue / Process Gcode, a new file appears with a FL_S1_ prefix for Stage 1 or FL_S2_ prefix for Stage 2. For example FL_S2_my_part.gcode.3mf. This is the file with FarmLoop’s eject sequence injected into the end-of-print G-code.
7. Send to printer
Section titled “7. Send to printer”Two options:
- Via Bambu Studio: open the
FL_S1_.../FL_S2_...file in Bambu Studio and use the regular Print button - Directly via LAN: if you have LAN-only mode configured, send straight from the app
At print end, the printer cools to your threshold, the FarmLoop bender fires, and the part drops into your bin.
How-to video
Section titled “How-to video”Prefer to watch? There’s a walkthrough video in the upper-right corner of the app, or jump straight to it:
→ YouTube: FarmLoop workflow walkthrough
Something didn’t work?
Section titled “Something didn’t work?”- Nothing downloaded after upload? You probably skipped step 5, click Add to Queue.
- Part didn’t release after print end? → Parts won’t detach
- Eject fired but printer errored on home? → Bed-leveling errors
- Any other issue? → Troubleshooting overview